Improving the user experience for our photogrammetry 3d-scan
This is a blog post about the latest updates we did with our photogrammetry software to improve the experience for the actors being scanned, but also for the operator.
We use 4 strobes to freeze the subject in our full body scanner. This is a good way to work as it freezes the actor at 1/10000s (within a 1/40s exposure). But, that involves having the subject in a somewhat dark room. I was looking for a way to improve the user experience by having:
Beautiful constant lights, which allows less of a shock when the strobes are fired, but it also feels better as it’s beautiful (this is so instagrammable!)
Audio countdown: this is managed by the software through a bluetooth speaker. The mp3 can be changed in case there are specific needs
Visual countdown: there is now a way to automatically push a different preset for the lights during the countdown. On this demo, I turned everything to rainbow (using a bmp file I uploaded in Xangle)
That is for the actor being scanned, but for the operator, this is also super great as there’s no need to scream a countdown or to manually turn off the lights. The whole workflow is automated. On my demo, I click the button only once, and the rest is automated
Hardware
Our current full body 3d scan is made of
165x Canon SL1 (18mp)
42x Raspberry Pis (handling the cameras and the LED strips)
10 LED strips (neopixels)
10x XangleBoard (Pi hats)
4x Profoto D1 1000w lights & 5x Impact Powersync triggers
Multiple 1GB switches and one master switch with a 10GB uplink (this is making a massive difference!)
One router
One desktop computer with a 2.5GB usb-c network interface (an internal 10GB network card would be better, but we can’t fit that inside our actual desktop)
Two Surface Pro on a T stand (this is just for my demo)
One bluetooth powerpoint presenter which I’m using as a trigger
Software
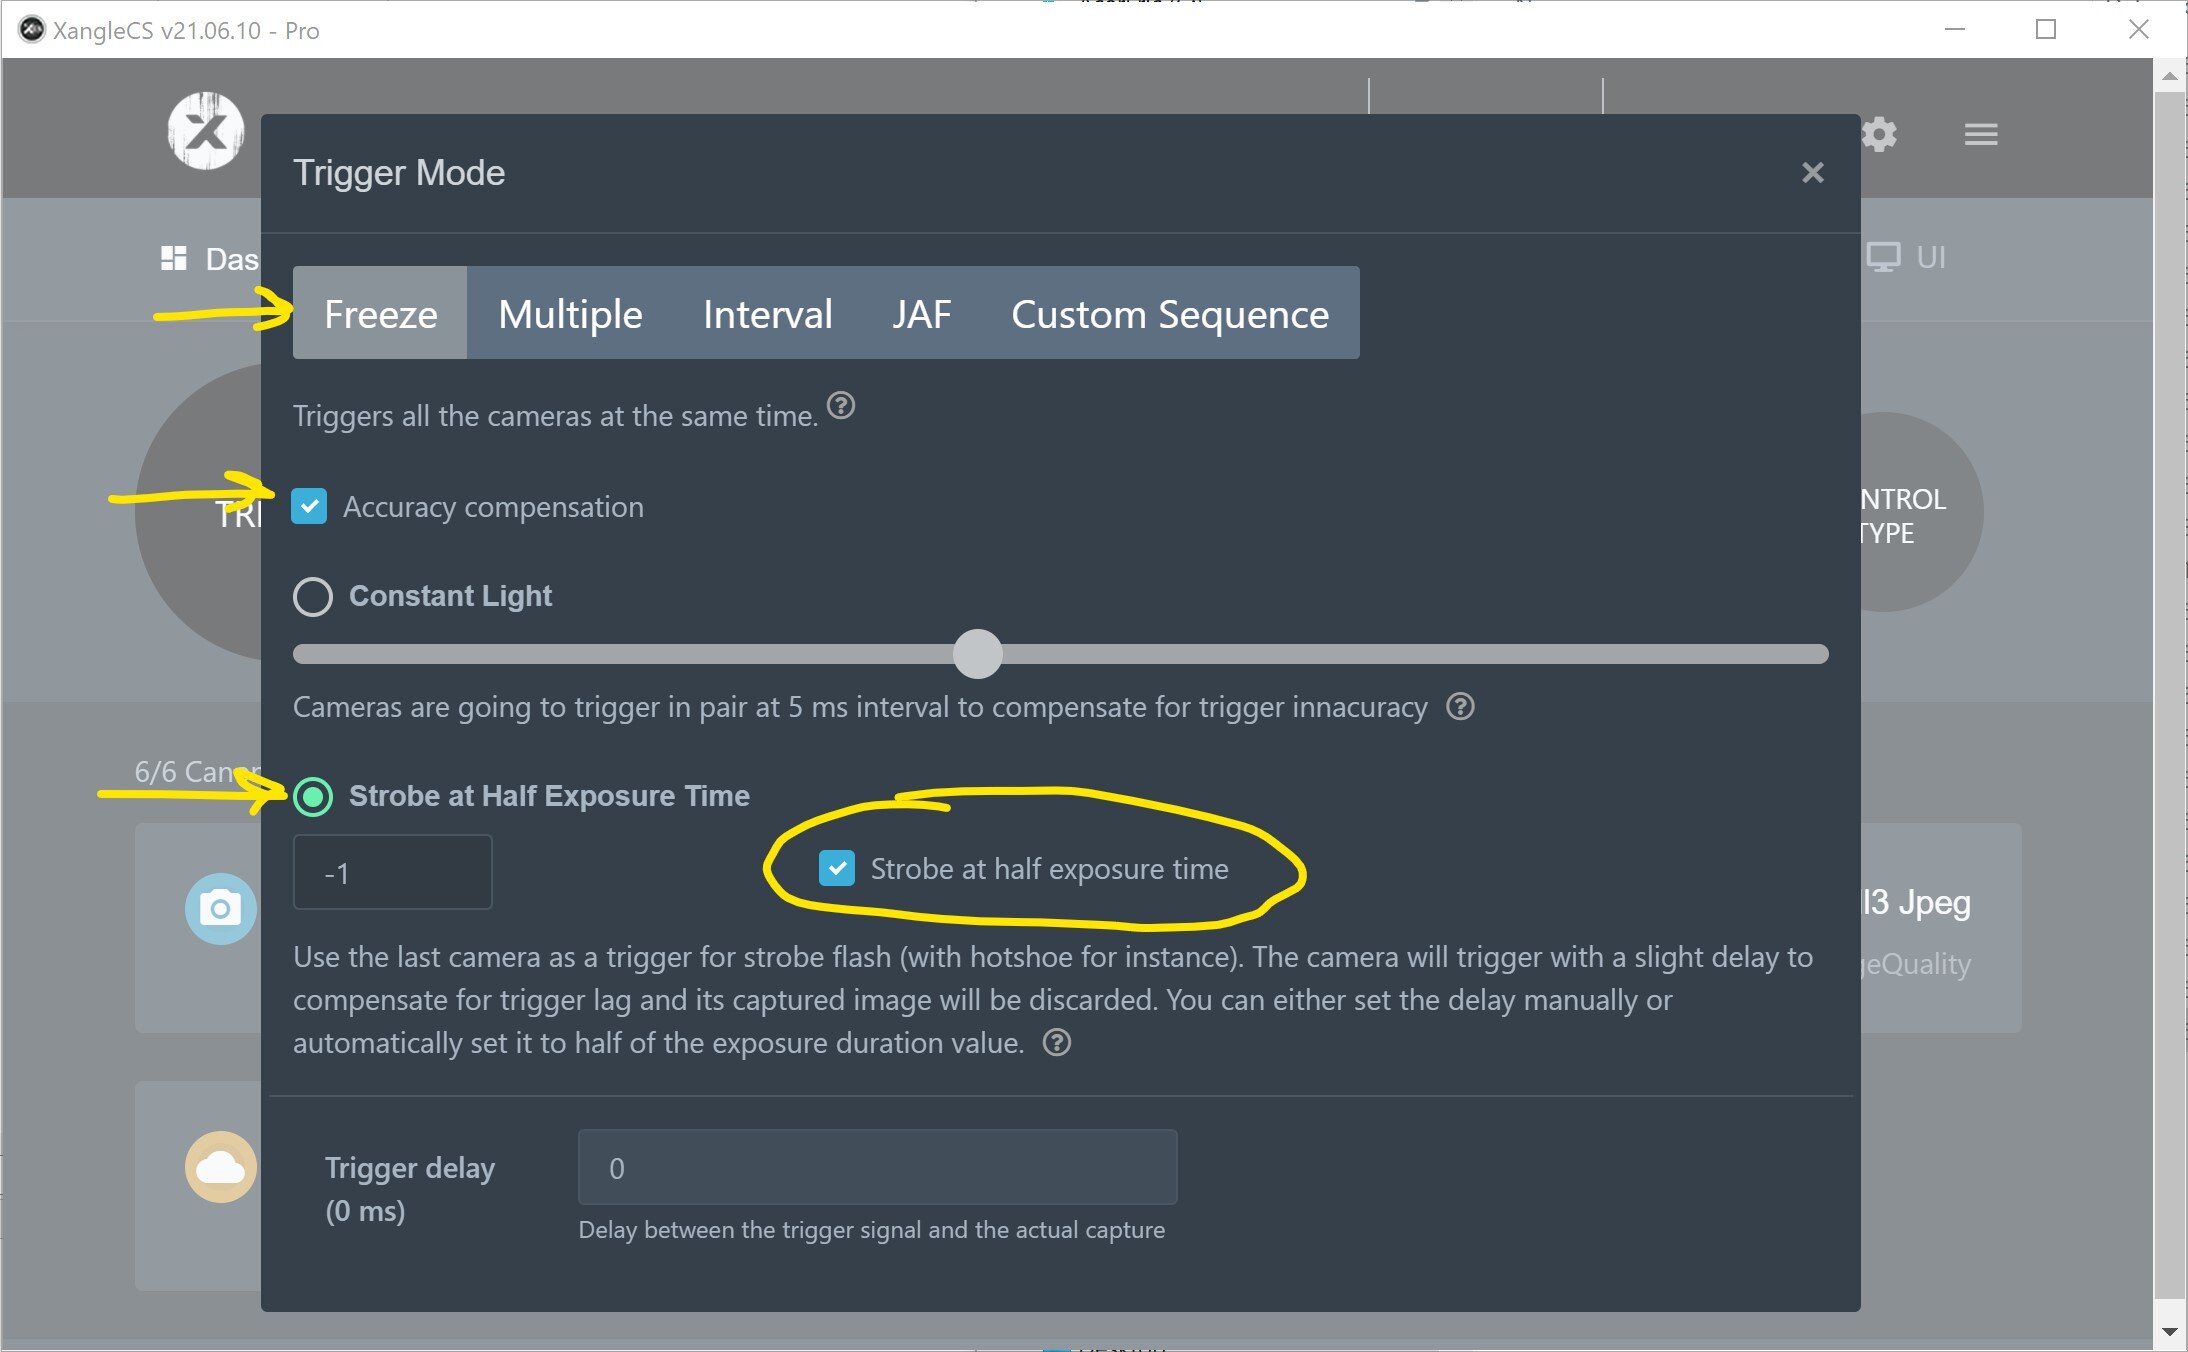
Triggering is made through Xangle Camera Server by USB (from the main computer, to the raspberry pis, to the cameras)
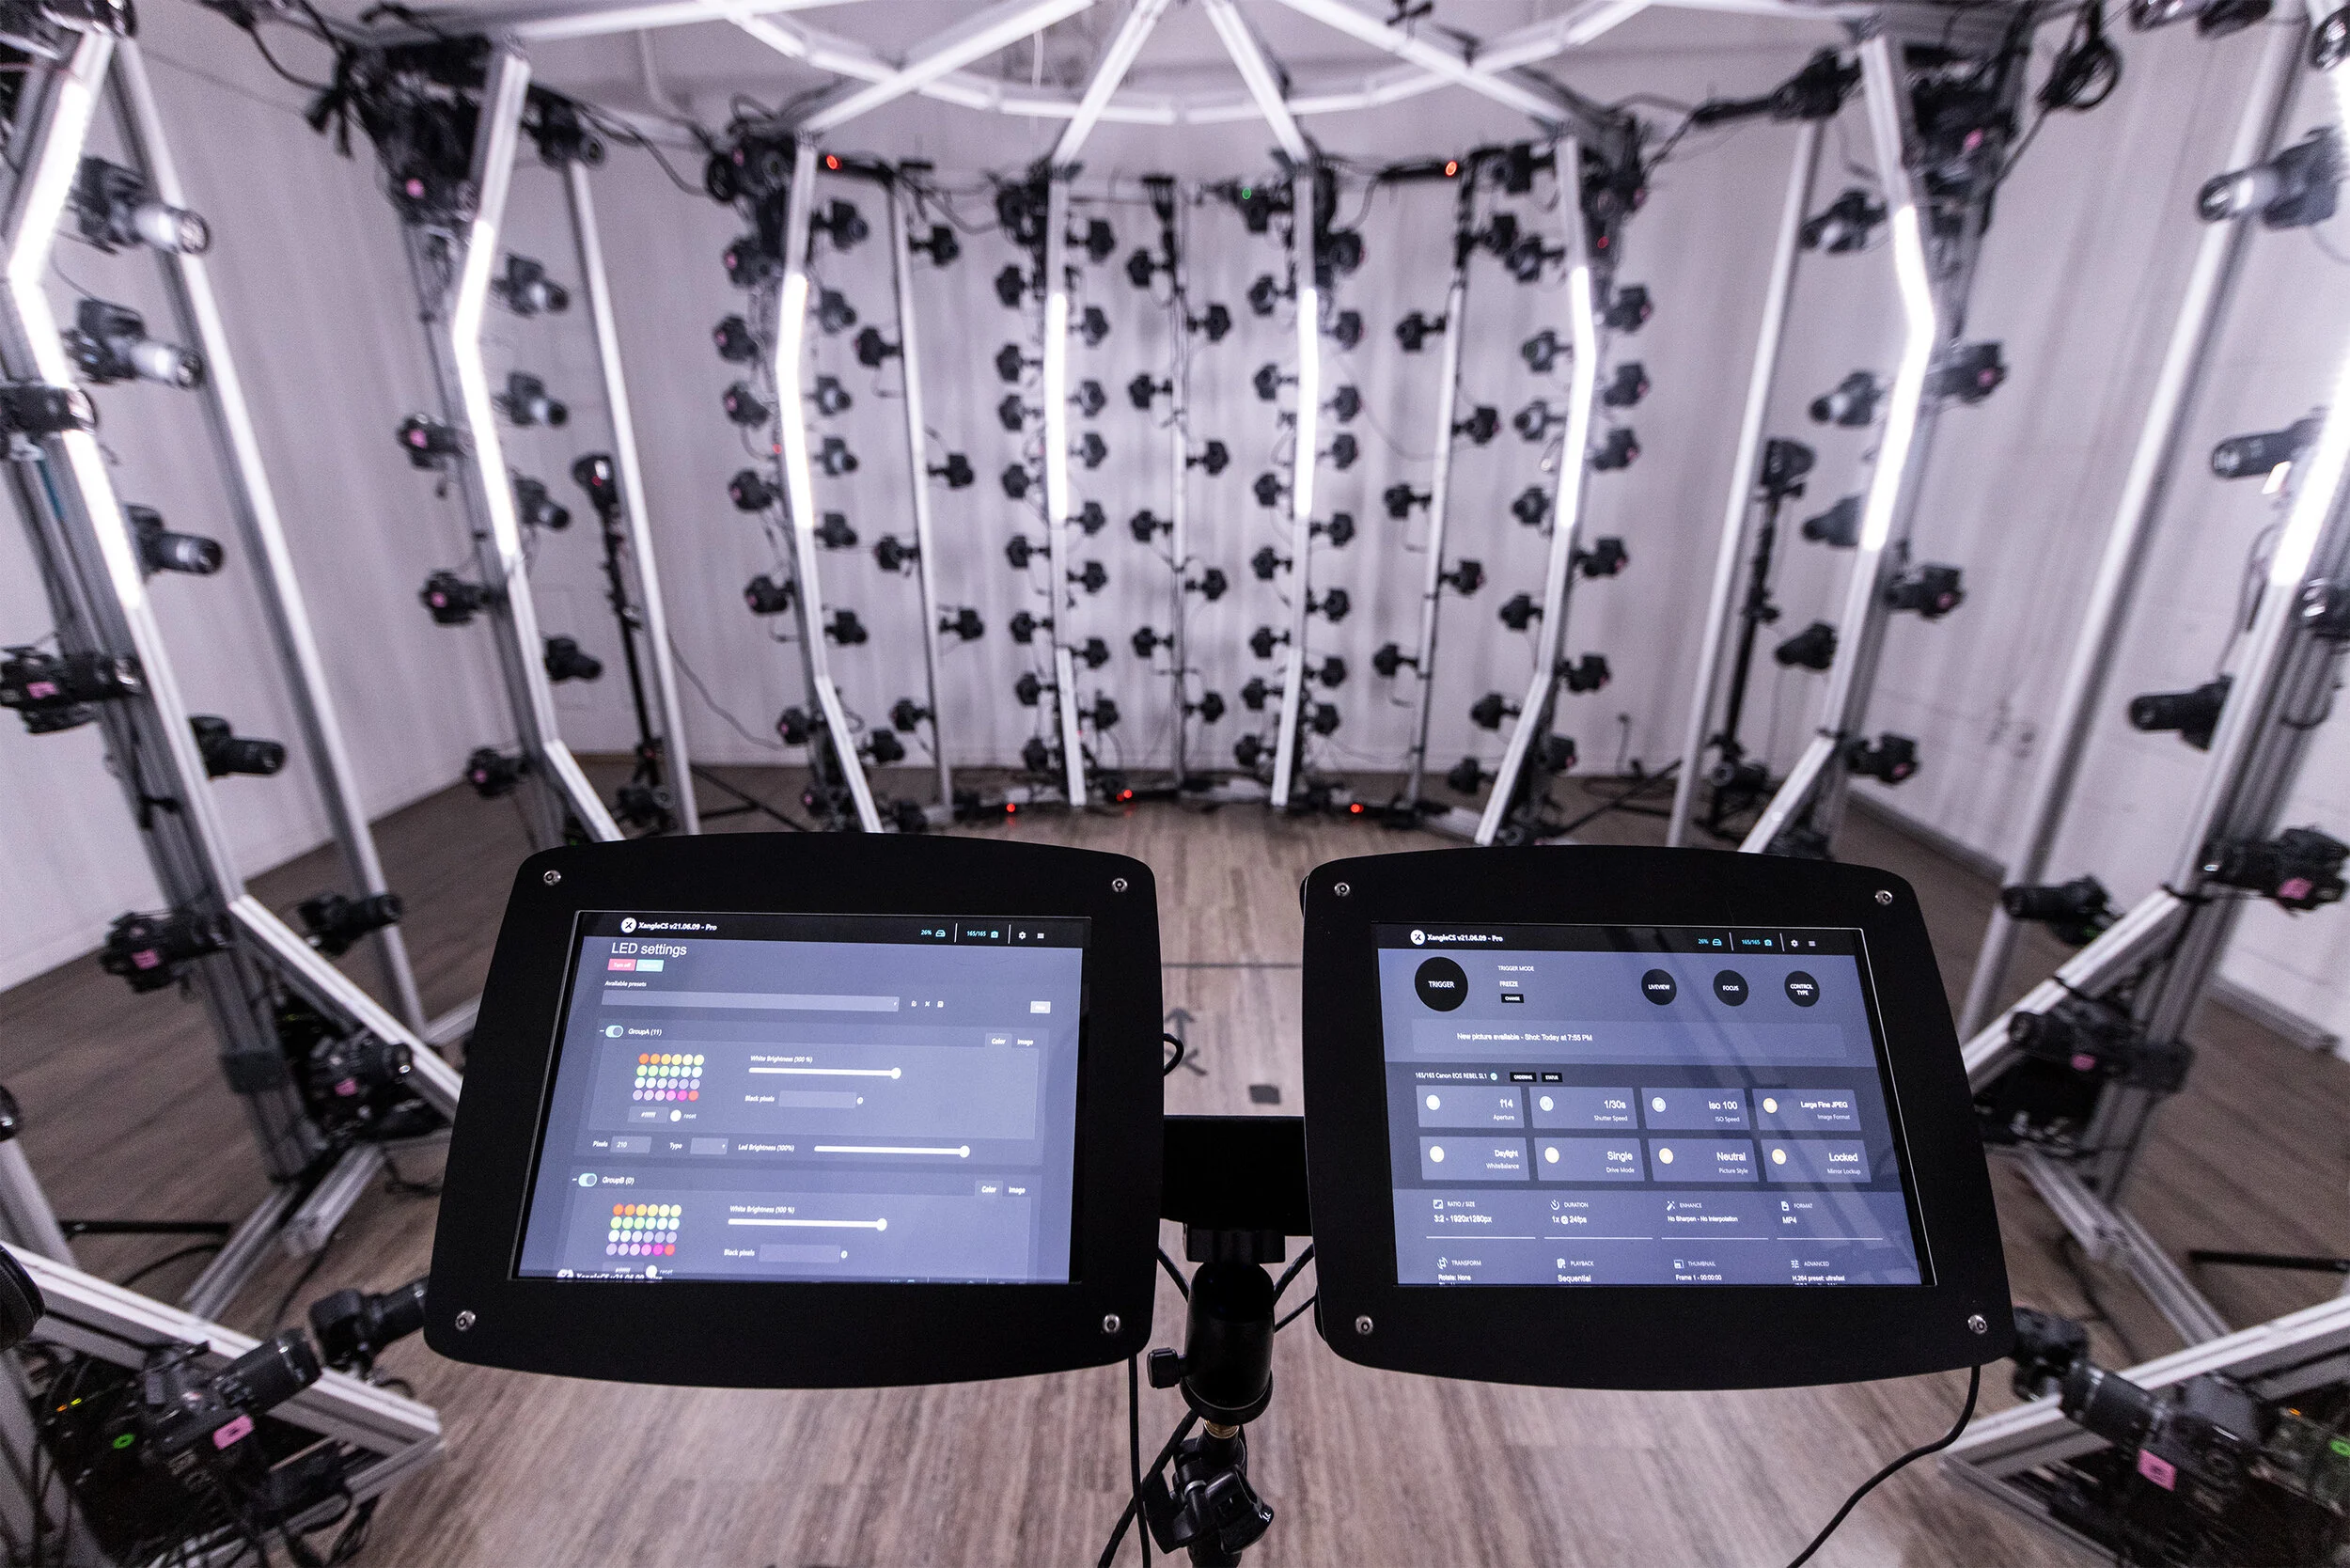
165-cameras full-body-scan photogrammetry station and two tablets showing LED control and the Dashboard (camera settings, trigger, status, etc)
Lights
The 10 LED strips are connected to 10 XangleBoards and are all controlled from the software. They are used only for the ambiance and they are turned off during the exposure. I tested with the lights on during the exposure and it didn’t create any problem, but as I’m going to do some action shots next week, I wanted to make sure that I was able to totally turn them off during the exposure time. The coundown shows a rainbow pattern (this can be set to any color or to any bmp you upload in the software)
The 4 profoto lights are fired using Impact Powersync triggers (one per flash), and a 5th trigger is on the hotshoe of a “sacrifice” camera which sends the signal exactly half way during the 1/40s exposure. This is a way to automate a “flash delay” (software feature from Xangle)
Performance
I did my demo (filmed in 8k with no cuts, no tricks except the in and out zooming) at a 1080p resolution in order to do something very fast (I wanted to keep my video under 30 seconds). The whole process took 7 seconds (from the moment the cameras are triggered to the moment everything is ready for preview)
For our normal scans with our clients, we go in 5k RAW and it takes 22 seconds to download all of the files (below 30 seconds for the whole process), with two preview images available within a few seconds
3d object rendering
This is really not my cup of tea, but I wanted to see how good (or bad) I would get a render using low res (1080p) images. This is my first render ever (thanks RC for the great tutorials on youtube!) and I’m quite surprised by how well it turned out. The 3d rendering is normally made either by our clients or by my team, but hey, it was about time for me to test this out! This is made using Reality Capture.

What’s behind the door on the left?
The photogrammetry station is in a white room (very useful to bounce the light), but next door, we’re operating our 176-cameras bullet-time system, and the same lights are used in very similar ways
Automatically turning off the ambient light at exposure time while I do the light-painting (in bulb mode)
Testing how fast we can do a change of color (different preset) during the exposure time
All right, that’s it for now! Let me know what you think about these updates. You can reach me at anytime at info@ericpare.com <3