XangleCs documentation
Cross-polarization
Using cross-polarization in a multi-camera 3D photogrammetry station helps to eliminate specular reflections and capture more accurate texture details. Here's why it matters:
1. Removes Unwanted Highlights
- Glossy surfaces (like skin, plastic, or metal) create specular highlights that shift based on the camera angle.
- These highlights are view-dependent, meaning they can interfere with consistent texture generation across multiple images.
- By eliminating these reflections, photogrammetry software gets clean, diffuse textures that align better across all cameras.
2. Enhances True Color and Detail
- Specular reflections wash out fine details and alter colors in the captured images.
- Cross-polarization preserves subsurface details (e.g., skin pores, fabric texture) by filtering out glare.
- This results in higher fidelity albedo textures, useful for 3D models in VFX, gaming, and digital humans.
3. Improves Photogrammetry Accuracy
- Photogrammetry relies on feature matching between multiple images.
- Reflections create false features that confuse algorithms and lead to errors in the 3D reconstruction.
- Removing reflections ensures better depth estimation and a cleaner point cloud.
How It Works
- Polarizing filters are placed on both the light sources and the cameras.
- The light's polarization is aligned in one direction, and the camera filters are rotated 90 degrees to block any reflected light.
- This effectively removes glare and specular highlights while keeping the diffuse component of the material.
Trade-offs
- Cross-polarization reduces overall brightness, so more powerful lights or higher ISO settings may be needed.
- It removes specular highlights, which may be useful for material property reconstruction (e.g., roughness, reflectivity).
- Some subsurface scattering (e.g., on skin) might be reduced, affecting realism in certain cases.
In 3D scanning for digital humans, cross-polarization is commonly used for clean texture acquisition. However, if PBR material reconstruction (including specular maps) is needed, a mix of polarized and non-polarized captures may be preferred. And this is what we’re going to explain in this article.
Head Scan Configuration: 110 Cameras (80 Bounce + 30 Cross-Polarized)
In this setup, we combine bounced lighting and cross-polarization, triggering both camera groups sequentially in a fraction of a second. This minimizes subject movement between captures. The entire process is executed with a single trigger click in XangleCS.

Equipment list
- 110 Canon SL1 cameras
- 30 circular polarizers (58mm thread for kit lenses)
- 4x Godox lights (bounce lighting, pointing outward)
- 6x Godox lights (cross-polarized, pointing inward)
- Square linear filters held in DIY mounts (3D printed & laser-cut components available upon request)
- Linear filters available on Amazon: Buy Here
- 2x Godox wireless flash triggers (one per flash group)
Hardware setup
- Set up your standard bounce lighting head scan following the basic guide.
- Add 6 flashes pointing inward for cross-polarization.
- Configure two Godox wireless flash triggers on separate channels:
- Channel 1: 4x bounce flashes
- Channel 2: 6x polarized flashes
- Attach linear polarizers to the inward-facing lights.
- Mount circular polarizers on camera lenses and adjust each one to eliminate reflections relative to the flash.
- Place a mannequin in position and include reflective objects to verify polarization alignment.
Here’s a demo from an earlier version of this setup where we had 91 bounce and 19 xpol lenses
Software setup
- Option 1 - Software based solution only (using two “sacrifice” cameras):
- Mount two Godox Wireless devices on two “sacrifice” cameras.
- Configure Trigger Mode → Custom Trigger Sequence for staggered firing.
- Example sequence:
- Group A: 7 cameras fire first.
- Group B: Delayed by 20ms, with the 7th camera sending its signal 8ms later.
- Option 2- XangleBoard Integration: If using XangleBoard:
- Use two 3.5mm outputs to connect to Godox Wireless devices.
- Set timing for each flash group via Xangle's board configuration.
- From the Files/Folders module, give a proper suffix for each of the cameras (in the “camera” tab. We ususally call them “normal” and “xpol”, which would give us folders that read like this (where “c” is the camera number, and the last param is the camera name. Use the custom naming to come up with your own file naming: https://doc.xanglecs.com/Folders-files-renaming-6bc6d7213c494885a2a433161a672173

Final Steps
- Once everything is set up, trigger both datasets simultaneously with a single click in Xangle. All files will be captured and stored in the designated folders, ready for processing.
This workflow is designed to streamline cross-polarization photogrammetry with minimal custom equipment. By leveraging off-the-shelf components and integrating Xangle's powerful triggering system, users can achieve high-fidelity textures with ease.
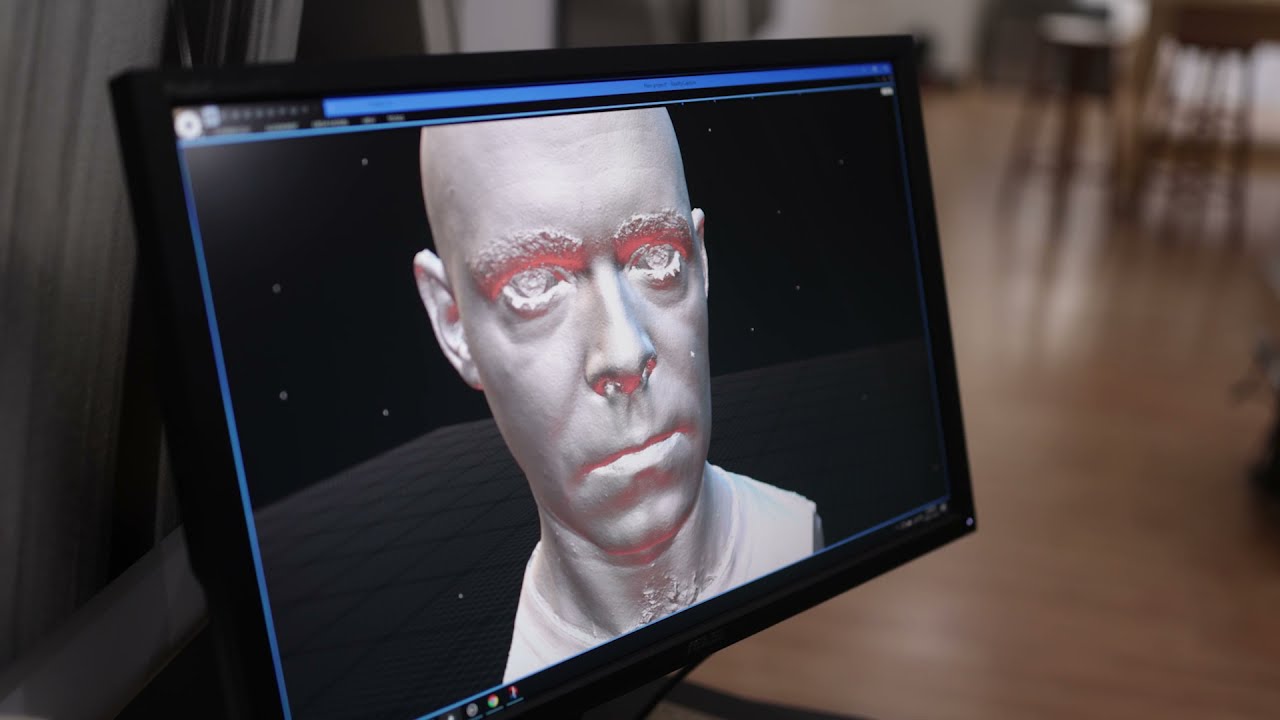
Result
FAQ
- Q: What ratio should you use for the number of cross-polarized lenses vs the bounce ones? A: I wish I had an answer to this one. As we’re not specialists on post-production, we mostly rely on the requirement of our clients and users. Some of them want just a few polarized lenses to give them a reference set. Some want just a few natural ones to see what the skin really look like (as few as a single image!). And some go all in on polarizers (on all lenses!)