Chroma key and guest-selectable branding kits: a six-camera bullet-time guide
November 2, 2026
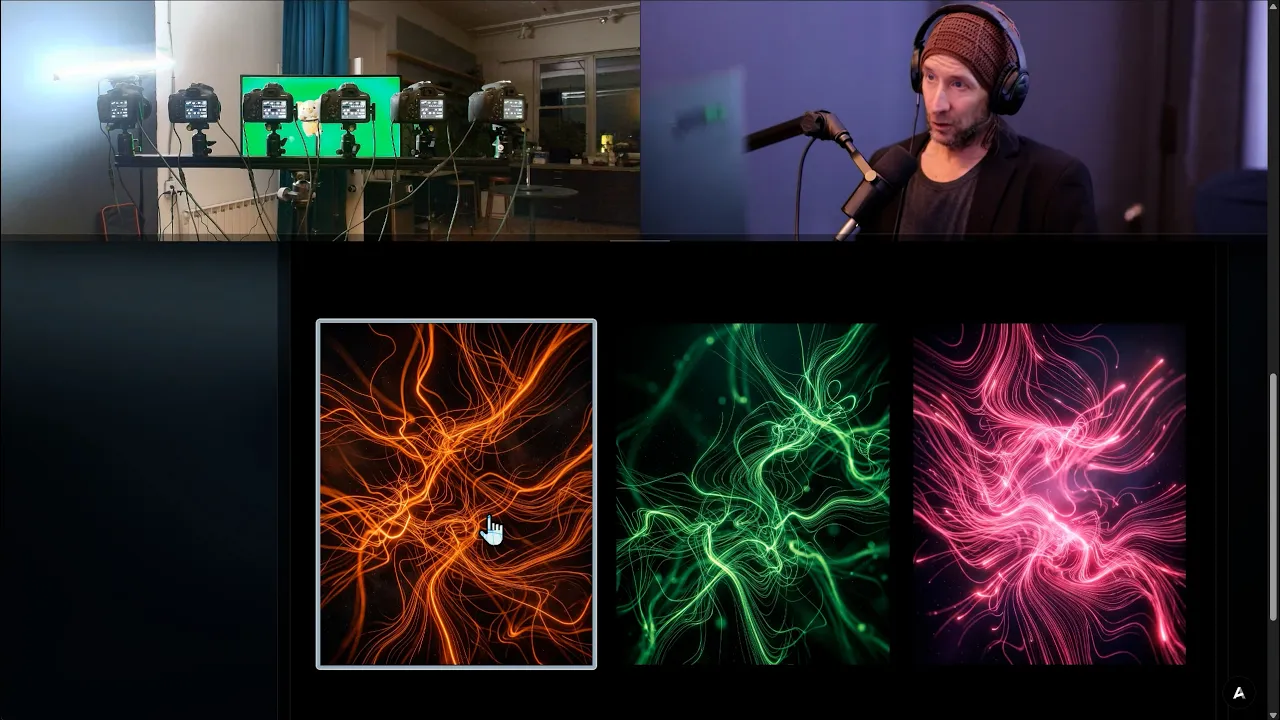
Let guests choose the look of their bullet-time video before you take the shot. In this six-camera demo, I set up three branding kits in Xangle Camera Server: green, orange, and pink. Each combines a replacement background video, an animated foreground overlay, and a soundtrack. Guests select a kit from a browser on a tablet, and the next capture uses their choice.
The video follows the full setup, from camera calibration and chroma key configuration to creating an event and sharing the finished videos. You can build the branding kits manually or use the integrated assistant to organize files you have already prepared.
What is a branding kit?
A branding kit groups the assets applied to your source images or videos. Depending on the result you want, it can include watermarks, animated foregrounds, soundtracks, intros, outros, and chroma key replacement backgrounds.
For this demo, each color kit contains four assets:
- Background video: replaces the keyed green background.
- Animated WebP foreground: adds an animated overlay in front of the captured subject.
- Audio file: supplies the soundtrack for the finished video.
- Thumbnail: identifies the kit on the guest selection page. It is a selection image, not the replacement background itself.
You can activate one kit in the Branding module and use it for every shot. For guest-selectable graphics, associate several kits with an event so participants can choose which one the next shot will use. Guest-selection branding kits require Camera Server PRO.
From the Stadia event to this six-camera demo
The video also revisits our 2019 Stadia event in Germany. That installation used a large green screen, 20 cameras, and four guest-selectable branding kits. Guests tapped a game on a tablet to choose the animated background for their video. The six-camera setup shown here demonstrates the same selection concept with three color-based kits.
1. Calibrate the cameras
Start with the cameras identified and correctly numbered, then take a test shot. Open Calibration and select that dataset. Xangle Camera Server calculates the cameras' positions in 3D and shows a comparison of the original and stabilized result.
Check the preview before moving on. In this demo, the uncalibrated sequence is visibly bumpy, while the calibrated sequence is stabilized. The resulting calibration recipe is used for subsequent captures.
2. Configure chroma key and cropping
You can reuse the calibration dataset to configure chroma key; you do not need another capture just for this step.
- Open Chroma key and select the reference dataset.
- Use the color picker to sample the actual background color. The default green does not match the monitor used in this demo.
- Adjust the crop to exclude anything outside the green background. Here, the monitor is smaller than the camera frame, so cropping removes the surrounding area.
- Check other frames and camera views to see how the key and crop hold up across the sequence.
The demo leaves a little color spill visible because the test conditions are imperfect. It is worth checking those edges rather than judging the result from a single frame. Back on the dashboard, the same dataset now serves as the reference for both calibration and chroma key.
3. Prepare the assets and create your kits
Prepare your background videos, animated foregrounds, soundtracks, and thumbnails before creating the kits. Use clear filenames that identify which assets belong together. In this example, the color names help group the files into green, orange, and pink kits.
To build them manually, open Branding, add a kit, give it a name, and import the corresponding files. Repeat for each option you want to offer. The branding kit documentation explains the asset types, source media, and output settings.
In the video, I use the integrated assistant instead. I ask it to inspect the prepared folder and create three branding kits, one per color. After I allow access to that folder, it proposes the three kits. I review the proposal and confirm creation, then check that each kit has the correct thumbnail, background, foreground, and soundtrack.
The assistant organizes the supplied assets in this demonstration; the background videos and other creative files are already prepared. Also, the animated foreground is not animated in the kit preview shown here, but it does animate in the finished capture.
4. Create and activate an event
Creating the kits alone does not enable the guest selection page. The next step is to associate them with an event.
Open Settings > Sharing > Events, create an event, and select the branding kits guests should be able to choose. Alternatively, ask the assistant to create the event and associate the kits. In the demo, the event is called "three colors."
Activate the event before opening its guest selection preview. The preview does not show the selection page while the event is inactive.
You can display that page on a second monitor connected by HDMI or open it in a browser on an iPad, another tablet, or a computer. The dashboard also provides shortcuts to manage the event, manage branding kits, and open the preview.
5. Let guests select, then capture
On the selection page, tap a kit thumbnail before taking the next shot. The capture then uses the calibration and chroma key recipes together with the selected background, foreground overlay, and soundtrack.
The demo first shows the animated background and overlay in the rendered result, then switches to pink and takes another shot to demonstrate the change. The choice applies to the next capture, so make the selection before triggering. For compatible kits, thumbnails, and selection settings, see the guest-selection branding kits guide.
6. Share the finished videos
Open the share screen to find the captures you have just made. Guests can access their finished videos using the QR code or the email form shown in the demo.
If you need to rename a kit, replace its thumbnail, change its assets, or add another option, return to Branding to edit or create the kit.
Video chapters
Chapter 1: Introduction and preparation
- 0:00 - Overview of the branding kits
- 0:41 - The Stadia event in Germany: 20 cameras and four guest-selectable kits
- 1:27 - How branding kits work
- 1:55 - Guest-selectable branding kits
- 2:27 - Preparing animated backgrounds, thumbnails, and other assets
Chapter 2: Software demonstration
- 3:08 - Software demo introduction
- 3:20 - Camera calibration
- 3:46 - Chroma key configuration
- 5:06 - Creating branding kits with the assistant
- 7:37 - Creating an event for guest-selectable graphics
- 9:34 - Selecting a kit and demonstrating automated capture
- 10:14 - Sharing the final videos
Documentation and references
- Chromakey: sampling, cropping, recipes, and background replacement
- Camera calibration and stabilization
- Branding kits: assets, sources, and output settings
- Events: creation, activation, and branding kit selection
- Guest-selection branding kits: requirements and setup
- Greenscreen + bullet-time with Google Stadia in Germany (2019)